Sunday, February 10, 2013

Or not

So maybe I am not winning the battle. "Plumb" and "ribs" just don't seem to want to go in the same sentence. 

But as stated before, stubbornness eventually wins. Bulkheads are going in.


"You'll never find a level in a boatshop"

That's what Jerry Briggs told me when we when we were building Julius a dozen years ago.


Jerry built by eye and he built beautiful boats. And Julius came out beautifully.

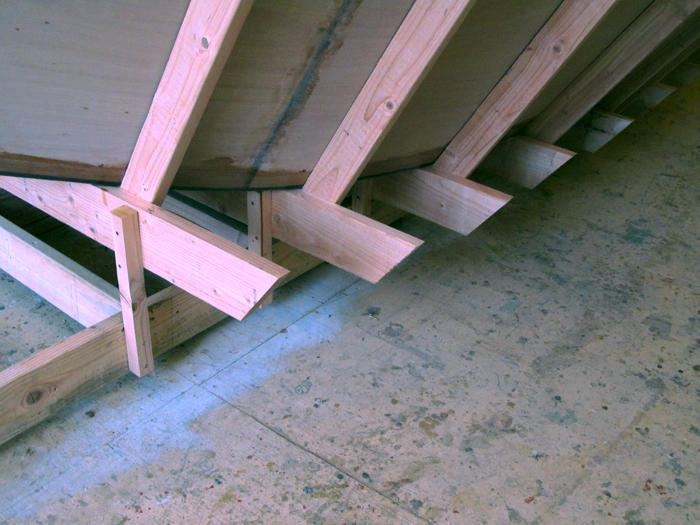
But here I am up against a pile of ribs that don't want to be plumb, and here I am with every level I own and half my clamps. The ribs would rather be at very funny angles.


Although the ribs are putting up a hell of a fight, persistence and stubbornness are slowly winning the battle.


Bulkheads next. Then decks, hatches, gunwales. Almost done. Ha.


Thursday, February 7, 2013

Ribs

After a lot of sanding, measuring, truing, adjusting, and cyphering, the ribs are beginning. Here is the first set. The bottom rib for this one and a couple others will be temporary, as they are in the middle of hatches, but the side ribs will stay for side support and gunwale strength.

What a treat to be working with wood again instead of that infernal fiberglass.


Wednesday, February 6, 2013

Making wood

This morning Josh and I milled out a pile of the lovely Port Orford Cedar that has been curing near the shop ceiling for the last few months. This stack should get us through the ribbing of the Rio Rojo, and well into the deck framing.


Here is a large, expensive pile of the sweetest smelling wood shavings you'll ever come across. If you have never smelled fresh Port Orford Cedar (or have and wish to smell it again) send a stamped (two stamps), self-addressed envelope to Fretwater Boatworks, 1000 Grand Canyon Avenue, Flagstaff, AZ 86001, and I'll send you a handful of heaven.


And this evening, back to the sticky stuff, fairing out the interior before we start dropping in the ribs.


Sticky tools curing, waiting to be cleaned up on the belt sander in the morning.


Tuesday, February 5, 2013

9 of 10 boatbuilders prefer Jameson over Bushmills

Okay, here's the deal. We need to lay three six-inch wide pieces of fiberglass tape along the insides of the chine. Each should be staggered about an inch from the other, so they lap out onto the floor two inches, three inches, and four inches--and up the walls four inches, three inches and two inches respectively. This could end up a big sticky mess, or a three-day project. Or we could...

Mark out the laps on the floor with a very fancy jig. And mark the center of the strips. Because, see, if you start laying them in at one end, they have to distort due to the curve they are going around, and they would be way too tweaked to work way before you got to the far end. So you have to start laying them down in the middle and work outwards.


That's where the Jameson comes in. These are empty bottles, but it would work with full ones. If the lids were on tight. 

Lay out sixteen feet of heavy plastic. Lay some markers down underneath it so you know where the ends and center of your glass strips will be. Measure out six strips of glass and mark the center line on each. Roll all but one up and set them aside.


Glove up. Mix up some goo. Squeegee the first strip of glass full of resin. Then take the whiskey bottles and roll the strip up starting at each end and rolling to the center line. Here's where you run into problems with Bushmills. The bottles are square and roll very poorly. Wine works, however.


Carry each strip over to the boat and start unrolling, dropping the glass exactly on your center line and following each lap layer out to the end, smoothing it in as you go, working out the bubbles and massaging the increasingly angular stretch of the glass into place.


If you are careful you can drop each of the three laps exactly on the center. Like I did here. (The other side was close but not this nice.)


Bingo. Done. Might as well do the bow and transom layups while we're at it..


Then--and this is very important--begin emptying two more Jameson bottles for the exterior chines, as the ones used tonight are all sticky and covered with fiberglass strands. It really helps take the edge off.

Monday, February 4, 2013

More sticky business

This afternoon I glassed the side interiors--two layers of 10 oz glass, intermingled at the ends. Very sticky business. Again, it came out surprisingly well.


Now for a little time out, then flow-coating and fairing.

Let's get sticky

With the bottom now attached, the clamps come off, the bottom gets trimmed and a strip of fiberglass tape is epoxied over it just to make sure nothing comes loose.


Then we turn the strongback inside-out, changing it--with the addition of a few new sticks, into a cradle, and flip the whole shootin' match over.


 Next we clean up the interior and begin the inside layup. A bomber base layer of 25oz biaxial 45/45 with 3/4 oz matte. Bad ass. A layer of 4oz. Innegra--a new miracle fabric that should add a great deal of resilience to the craft; and a cover layer of 10oz. glass.


The lofting ducks are delighted to come out of the cold lofting room and swim in the silky new pond.


Before we saturate the new layup, we are spooging in a chine fillet to smooth the corner transition.


 Then in with the goo--Resin Research 2040 fast kick. Let's see if we can get it all done before the corner fillets begin to kick.


Fred is mixing, Dennis is rolling it through, and Lora, Dan and I are squeegeeing it all into place. Starting in the center, moving to the perimeter, massaging all the wacky corners into compliance. Go, go go.


Amazing. It works again. The Innegra does not lose its whiteness when saturated, which is hard to accept when you want to see all the glass fully saturated and translucent. But we git 'er done.


Now, after some more annoying grinding, We're ready to juice up the sides.


 The ducks think they've gone to heaven.


Thursday, January 31, 2013

Bottoms up

Indeed. Time to tilt a malted beverage. The bottom is on. This morning started with the dance of the epoxy cobras on a successful bottom scarf.


The next part, which I had been dreading, went amazingly smoothly. Getting the bottom fair and level. Perhaps due to the ridiculous amount of prep I had put into getting this far, the bottom edges were pretty much ready to rock.

In test clamping the bottom on, one of my very clever clamp set-ups exploded. The board I was clamping just about knocked me out, but not quite. A little blood and a fair warning. 


Persistance usually wins. The bottom is epoxied on. Tomorrow, perhaps, Rojo will roll and get set up for her interior glassing. Or maybe I will sleep in. Hard sayin.'


Wednesday, January 30, 2013

To hull with it

For close to a week I have been dancing back and forth between lofting and reality, neither of which seem to want to make the boat quite right. Lofting makes lovely lines, but reality insists that they be changed again for the plywood to actually do that. Finally, today, after about three returns to the drawing board with the ribcage, we got what we wanted. So we created side one, traced it onto another panel to make the reciprocal and identical side two, then fastened side one onto the strongback--then took a break. Progress at last.

This evening I cut out the second side, set up my one-man-band side clips and man handled it onto the boat. Astonishingly, it fit just perfectly. We may have a symmetrical boat. How odd.


And back to the scarfing table for one last squashification, making two sheets of half-inch plywood into one big long floor. Here are a couple examples of previous scarfs. The first is mighty well squashed.


This other one may have had a wee bit of extra epoxy in it.


 Turning plywood that has been scarf-cut but in the way for the last several days, into a floor.


 And the lights go lower for the evening reflective session. It is starting to look like a boat.


My social life these days:


Buddha taking on a bit of sawdust.


Sometimes way too loud is not nearly loud enough.


Sunday, January 27, 2013

Back to the drawing board


The heavy pig iron sure squashes a nice scarf joint. The side panel scarfs are now done and I've dragged one of the finished sides over onto the strongback. Now it's just a matter of clamping it on, right?


Not so fast, sailor. Now it is time to see if all your beautiful massaged and lofted lines are actually something that a sheet of plywood will agree to. So I clamp the entire uncut sheet into place and, ummm... hmm. Turns out is isn't. The angles where the straight part of the boat begin to turn into the bow and stern need to be reduced a bit. Either that or add a foot to the height of the transom, which might look a little odd. Or have the oarlocks under water.


So I adjust the angles on a few of the mold stations and by and by, with the use of about forty clamps, the plywood succumbs to my will. So now I will take the adjusted stations back to the lofting table, transfer the new points, re-fair the lines, make the forms symmetrical to the new lines and... I think... I'll be ready to assemble the boat. And I will have a full set of accurate lines on the lofting boards with which, should I ever decide to build another of these boats, will save me a whole lot of time and effort.