Tuesday, February 15, 2011

A good natured ribbing

After taking Monday off to do neglected tasks and ponder the next move for Edith, I spent part of the evening leveling her to match the profile of the plans. She's now stable and ready. This morning we tried steaming a rib and clamping it directly into the boat.


The hope was that the ribs would come out of the sauna pliable enough to simply clamp into the hull and screw fast, saving a few steps. No go. That old phase strong as an oak is based on something after all.

So we dropped back to plan B, cutting some forms out of scrap two-by-fours and clamping the ribs to those. They don't give in easily. My favorite 300-lb squeeze clamps wouldn't quite do it, so we ended up with two 600-pounder clamps per rib, crushing them into shape. That's over half a ton. And a few other clamps mid-rib where they want to start splitting. They finally succumbed.


Once they've been in the steamer for an hour and a half, then the torture rack for a couple more hours, they seem pretty amenable to being clamped into the boat and screwed fast. A squeeze clamp on the gunwale, two deep-throat vise-grips mid-rib, and the trusty old lobster claw near the base.


So now we're in mass production, eight at a time. Three in the boat, eight in the forms, and 29 to go. That's a rack of ribs. Thank god Dan and I both have clamp fetishes.

Monday, February 14, 2011

Cost and schedule

On June 16, 1911, the Racine Boat Company sent the Kolb brothers a bid for $450 for two custom boats, including oarlocks and two pairs of oars per boat. They estimated the boats would be ready to ship in five weeks, on July 25. The deposit check of $250 was a few weeks in getting to Racine, but still the boats were complete by August 15. The final bill was sent that day, including an additional two dollars for 150 feet of half-inch manila rope.


The internet gives a conversion factor of 23.275 for 1911 dollars compared to today, meaning each boat (with oars and oarlocks), in today's dollars, would cost about $5237. The rope would be about $46.50, or about 31 cents a foot.

The boat and oars are going to run somewhere in the neighborhood of $3000 for materials, but the rope is only $.23 a foot. We're about two-and-a-half weeks into the build and about half done, so let's see: 4–5 weeks, average of two folks working. That's about 300- 400 hours. So we're making minimum wage.

All in all, it looks like we're on schedule and within budget.

Remarkable.

But I think we need to ask Fretwater Boatworks for a raise.

Sunday, February 13, 2011

Edith's first righting

Today was the first time—hopefully of not too many times—that Edith rolled right-side up. It went surprisingly smoothly. We disconnected the strongback from the floor, slipped the hoist straps beneath her, and pushed the magic control button to see if she'd fly. The shop monster levitated from the floor.


Then we gathered around and did it for real.


Wow. Nothing exploded. There she sat, like a big beetle flipped on her back, legs in the air.


After disconnecting the strongback from the hull we hoisted it free—the chrysalis shedding her husk.


After knocking down the strongback we hoisted it to the storage loft until the next Galloway build, or until it gets in the way. Or until I run out of firewood.


And there she sat. A naked hull.


Looks good from this end. The afternoon sun spot from the stairwell approves of her.


Looks good from the other end too. I think we'll keep her.


The sheer line is a bit wobbly. As Jerry Briggs once pointed out to me, it only takes about 1/8 inch too high or low for a gunwale line to look really wrong. We'll fix that when we put the gunwales on. It will involve a lot of walking in circles, squinting, hemming, hawing, and perhaps a beverage or two.


Climbing aboard, I imagine standing in the cockpit, pushing into Granite Falls. Eeek.


Ready to roll

Well. Hmm. Let's see. This morning I equalized the sheer so that both top boards are the same—that is to say, symmetrically kinda close to correct. We'll fine tune them a bit more once it's right side up.


Jess and I riveted the final strake on while Dan finished off about a zillion screws that needed replacing or tightening. 


And that was it. The hull was pretty much done. Yoohoo! 


Time to trim and do a few details: Plane off the chine.


Trim the transom.


Chink the bottom.


And start the process of LTV. That is, Linseed oil, Turpentine, Varnish (spar). An equal mix of the three, brushed on until she can't drink no more, then rubbed dry.


This may sound easy, but there are some factors. Turpentine fumes. Thirst. Whisky. And the time between coats increases the exposure to all these things. The good part was, we cleaned the shop between coats two and three.


And were done early enough to quit at a sensible time. But first, a few photos. Damn, she's pretty.


And a little whisky.


And a few photos of the whisky.


Wait, that's a whole nuther bottle.


So much for quitting early.


Let's not start too early tomorrow. Sunday, you know.

Friday, February 11, 2011

Sheer joy

A rough start in the boatshop. Last night's late shift found its way into the whiskey bottle and the morning fog was thick. But we got rocking by mid day, cleaning up the blanks for the sheer strakes, spiling the lines, and cutting them out. Dan has become a professional chine beveler. Jess took some great photos, including all those on this post.


Then we checked the bevels to make sure she'd go on.


Once those were looking good we clamped her on.


And pondered.


And riveted. Man, it's tight quarters inside there with a ball-peen, nippers and a roving iron. 


The next move was to rivet the other side but we were tired. So we decided to quit. But first we thought it might be nice to trim the transom.


And that is starting to look pretty cool. Then we got ready to quit.


But we thought it might be nice to plane the chine down a little first.


So we did that for a while. Then we quit. It is at that stage where everything you do really adds to the growing beauty of the beast. So before shutting down we pondered it a little more.


And then we quit.

And then I had to make this blog post.

But now I am quitting. Really.

Thursday, February 10, 2011

Bound for sheer terror

Yow! We got both binder strakes on tonight and both sheer strakes spiled. laid out, cut out and scarfed. Dan worked the day shift with me, Dennis the night shift. It's really starting to look like a boat. Here is the second binder emerging from its rough sawn motherboards. Fun to find the board you want buried an these wiggly, woggly planks.


And the binder strakes wrapped on.


A view I hope I don't get on the river:


And the sheer strakes laid up. Man that looks just wrong:


The blue tape is holding brown epoxy in the various knot holes and weird spots. It's not easy to get clear northern white cedar, and I sure didn't.

We got a bit of humor today regarding our upcoming Grand Canyon voyage for Edith. The rumor of the moment is that they may do another flood flow this spring, right in the middle of our trip: 40,000 cfs. And I thought this boat looked narrow and tippy and tiny when thinking of running the gorge on 8,000. Egods.


Wednesday, February 9, 2011

Binding the Binder Strake

This afternoon we cut out the first curved binder strake and planed in its bevels. She fits like a dream and is ready for the riveting crew. Where's my riveting crew?


This evening I finished spiling out the shape of the second binder strake on the floor. Then I picked out two boards that would cover the drawing and scarfed together  a wonderfully wiggly binder blank. Tomorrow we'll transfer the spiling to this one, cut, bevel, and affix it to the boat. 

Once the riveting crew shows up.


Much as I love building plywood dories and McKenzie boats, there is something very aesthetically thrilling about lapstrake construction. And the smells—instead of the chemical stench of epoxy work, it's the aromas of wood shavings. Better for the body, better for the soul.


Tuesday, February 8, 2011

Spilin' for a fight

This morning Dan and I took the spiling board I made last night and spiled the lines off the broad strake. It is a delightful process, really, of pure geometry. Affix your spiling board onto the boat where the strake needs to go, below the edge of the previous lap line. Place the point of a fixed compass on the edge of where the strake joins the boat. Draw an arc on the spiling board. Repeat every foot or so.


Put spiling board on a piece of paper, in order to see what shapes you're looking for (the floor works fine too). Draw a X onto your paper by placing the point of the compass on any two points of the arc and swinging the lines until they cross. Do this for each arc. Connect the dots. There is your strake line, precisely and quickly. You can do this for the bottom of the strake as well, or just measure down from the top line.


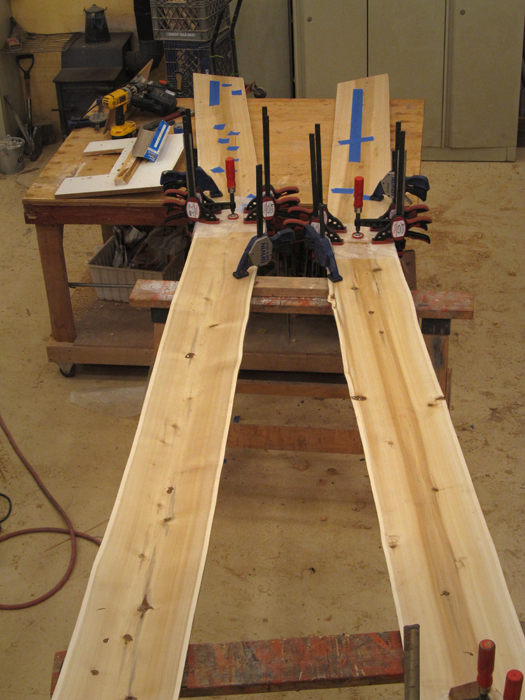
Now find two boards that will cover the drawing when placed at the proper angle. Then scarf the boards together at that angle.


Glue that bad boy up.


Once that's set up, go ahead and spile the lines on precisely, cut it, plane it, and rivet it on. Repeat as necessary.

The good news is that we still have enough wood to remake the strakes, and the mistakes (mistrakes?) will get used in the deckwork and bulkheads. Whew. 

Okay. Now where were we two days ago?