Saturday, May 16, 2015

Fuego

I had a week between trips to fix my little boat wreck from Waltenburg Rapid. I hit the very tip of the bowpost cap. By a stroke of good luck following bad, it exploded without affecting the hull at all. It's really just a bumper anyhow. However, the boat flexed a bit, cracking a few ribs. River repairs consisted of a bit of duct tape.

Back in the shop I cut a new bow post from some locust Jim Mackenzie gave me. The old busted piece is at bottom of picture.


Then I got to dig out all my deep-throat clamps to repair the cracked ribs.


One of my favorite clamps:


Dab on a bit of George Kirby's finest paint.


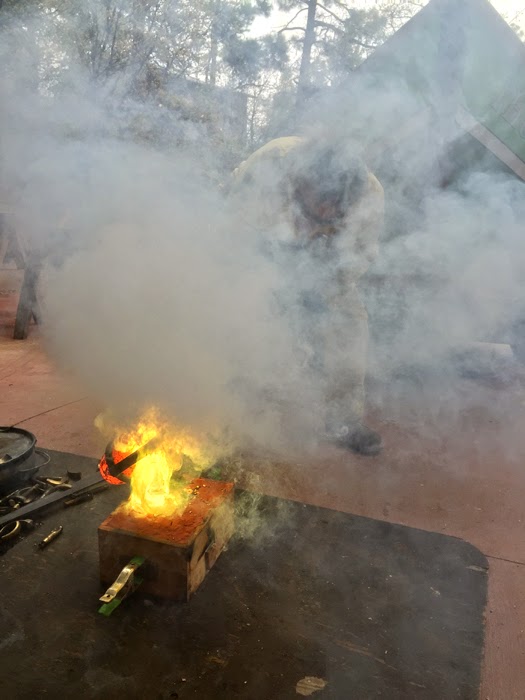
And for a final touch we had an impromptu firing of the foundry last night. We melted down a pile of old oarlocks, which for some reason make a lot of slag, green flames,  and billow noxious smoke.


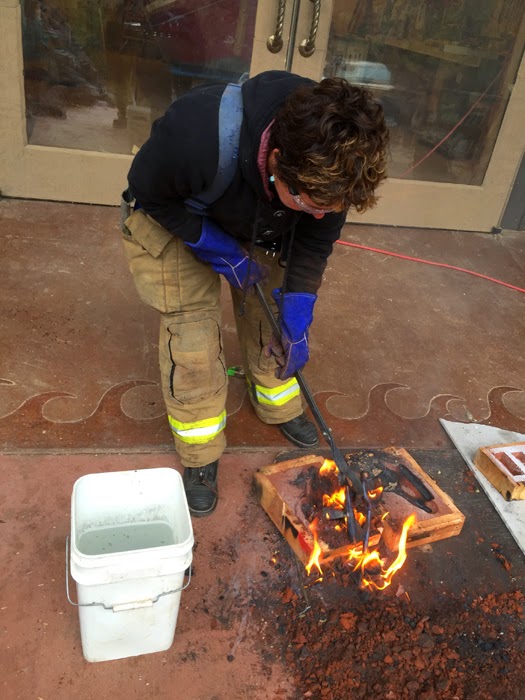
Here is Marieke making the mold.


And me pouring. Wow this is some weird bronze.


A bit of grinding an polishing.


And it works. Look. A new bow eye. Roy calls it a nose ring.


BJ made a nice breasthook for the Thunder Liver.


Roy needed some big oarlocks for his big fat oars.


Foundry work is so fun. I took a lot of the same cool picture.


Marieke cast some oarlocks last year but the bronze was too malleable and they bent. So we are using melted oarlocks just to see if they are stronger.


The casting winds down.

And the polishing begins. In addition to the bronze, we polished of some Bushmills. This morning the bronze was a lot shinier than we were.


Friday, May 8, 2015

Nonstop Problem Solving--Teaching the Art and Craft of Boatbuilding

Wade Smith, who taught boatbuilding at Mystic Seaport for years and now teaches at WoodenBoat School when he's not working as a boatbuilder, came out to teach us a bit about the ways of eastern boatbuilders. As Wade and I batted things around, we decided to co-teach the course, with him focussing more on traditional techniques and myself focussing on the Oregon drift boat style that is so popular on western rivers. On day one we had a bit of lecturing and then jumped right into lofting. By evening we had completely lofted a McKenzie drift boat and all its ribwork.


On day two I more-or-less split off and began coaching folks on translating the lofting to reality. One of the students, Ryan, had amassed the materials to build the boat back when he was in high school, but sputtered out quickly on the actual build. So we had him bring in his materials and be the guinea pig. We spent a while building ribs, a bow post, a transom, and scarfing together the plywood sides. 

Meanwhile Wade launched into a far more complex boat--a beautiful knuckle-sided Swampscott Dory which I am now obligated to build. More on that later. So as some folks helped with the McKenzie, others focussed on the Swampscott lofting.


Before long we had all the parts ready to assemble the McKenzie,


and the Swampscott team was building the actual forms to build the boat on.


We used my McKenzie as a form to steam-bend chines and gunwales.


 On day three the sticks began to become a boat.


And the molds for the Swampscott kept taking shape.


On our final day we dropped in the inner chine logs on the McKenzie and put on the floor.


I took time out to build a small section of a boat, smash it into a rock in Hance Rapid (simulated with a splitting maul), and demonstrate some of the patching theories we use down there.


And the Swampscott form came to life on the lofting table.


As with the Oar course, everyone seemed pretty psyched with what they'd learned and went away hungry for more. I am thinking we may do more of this sort of thing. And the folks who worked on the Swampscott are not going to let me off the hook on building her. So look for that sometime after the river season. Wade may even return.

(Thanks to Helen Howard for many of these pictures.)


The Oar House

In early April Fretwater Boatworks hosted a four-day oar modification workshop. We started out with oars ranging from fairly decent Swansons to strai=ght-shafted Gulls to bludgeoning old South Branches. In some ways it might have been easier to start with new, raw planks, but it was fun finding the sweet oars that lived deep inside those old telephone poles. First we found the centerlines and drew out symmetrical lines to cut to as we shaved them down. 


We drew a straight taper from the oar stop to the tip, ending with a 3/16" tip. Then we got serious with a screaming power planer.


And an in-line sander.


Then it was time to find the centerline in the other direction and continue tapering the shaft into something approaching a square.


In the near corner Greg Loehr is working with Kim using his tool of choice--the large-grit grinder.


We kept the full tapered thickness down the center of the spine of the blade, and tapered off to 3/16" around the edges. We also hollowed out the blade between spine and edge. Every ounce of needless wood you take off the blade is two or three ounces you don't have to lift out of the water a thousand times a day, a hundred times a summer. For decades. It adds up fast. Here is a shot of Kim's new thinned-down, slightly shortened oar tip, with lined up with the un-thinned oar tip we cut off before grinding. You can see the blade is now about half its previous thickness.


Greg, who made his living grinding surfboards for longer than he cares top admit, was very patient with our incessant measuring and drawing of lines, then went ahead and freehanded his own oars. Don't try this at home.


Once we got them thinned and tapered, we put on super-thin glass tips.


Oh, and we also put nine-ounce lead slugs in the handgrips--not enough to feel weird, but enough to approach optimum balance. And we put on leather wraps and stops. But for some reason I forgot to take any more pictures. That would have been smart, huh? Oh well. Everyone went away pretty excited with their new skills, understanding, and remodeled oars. I think it was a success. May have to do it again between seasons.